
愛媛県(松山)の絶対すぐ借りれる街金!
激甘審査でブラックでも借りれる街金、おすすめ17社。
愛媛県(松山)の激甘審査の街金、果たしてその魅力とは何でしょうか?
多くの街金が存在する中、なぜ愛媛県(松山)のものが注目されるのでしょうか。
審査が甘いとは言われていても、その真実を知ることはなかなか難しいものです。
この記事では、愛媛県(松山)の激甘審査を行う街金がどのような特徴を持っているのか、また、どのような人たちにとって有利な選択肢となるのかを解説します。
読者は、街金を利用する際に必要な知識や注意点を身につけることができます。
この記事を読むことで、愛媛県(松山)の街金を上手に活用する方法がわかり、金銭的な悩みを解消する手助けとなるでしょう。
- 愛媛県(松山)の街金!即日融資の中小消費者金融おすすめ一覧
- 1.クレジットカード現金化【プライムウォレット】選ばれ続ける超優良店
- 2.クレジットカード現金化【インパクト】最短5分で振込完了
- 3.クレジットカード現金化【あんしんクレジット】業界最高クラスの還元率
- 4.クレジットカード現金化【Quick現金サービス】とにかく早い!
- 5.クレジットカード現金化【どんなときもクレジット】初めての方、換金率3%UP
- 【QUICK39】お金を貸してくれるところをご紹介
- 1.【フクホー】ゆとりのローン!安心の金利7.30%〜
- 2.【スカイオフィスキャッシング】スピードと信頼の消費者金融
- 3.【キャレント】で借りんと!融資申込みキャンペーン中!
- 4.【アロー】最短即日融資もOK
- 5.【アルコシステム】信頼と実績のキャッシング
- 6.【プラン】全国どこからでも24時間簡単ご契約
- 7.【クレジットのニチデン】簡単・便利なネットキャッシング
- 8.【いつも】いつものキャッシング
- 9.借りやすくて返しやすい!キャッシング【フタバ】
- 10.来店不要・振込キャッシング【パーソナルクレジット セントラル】
- 11.安心できるパートナー【ハローハッピー】フリーローン
- 12.来店不要・振込キャッシング【女性専用 マイレディス】
- 女性専用!在宅で稼ぐ【FANZAノンアダルトチャットレディ募集】
- 愛媛県(松山)の街金|サービス対象地域について
- 愛媛県(松山)の激甘審査の街金を探すときの注意点
- 愛媛県(松山)の激甘審査の街金は審査が甘い
- 愛媛県(松山)の激甘審査の街金は在籍確認なしか
- 愛媛県(松山)の激甘審査の街金は総量規制オーバーでも借りれるか?
- 愛媛県(松山)の激甘審査の街金で即日融資を受けるには
- 愛媛県(松山)の激甘審査の街金と、闇金との違い
- 愛媛県(松山)の激甘審査の街金で審査落ち・・お金を借りれないときは
愛媛県(松山)の街金!即日融資の中小消費者金融おすすめ一覧
かんたんアンケートに答えるだけで、おこづかいをゲット
| 無料会員登録!アンケートに参加するだけで、お小遣い稼ぎ |
|||
| サービス名 | サービス内容 | 報酬額 | 無料登録 |
| 【マクロミル】 |
スマホやPCで手軽にアンケートに答えて「現金」や「電子ギフト券」に交換可能なポイントがもらえます! | 新規登録で最大1000ポイント!(1,000円相当) | \会員120万人/ |
【オピニオンワールド】 |
かんたん登録1分、会員登録無料!ポイントを現金かギフトカードに交換 | アンケート1回につき、最高900円! | \900円ゲット/ |
【ボイスノート」】 |
かんたん登録1分、アンケート参加でポイントを現金かギフトカードに交換 | 会員登録だけで70ポイント獲得! | \今すぐ登録/ |
【モニタータウン |
かんたん登録1分、設定5分、会員登録無料!現金かギフトカードに交換 | アプリインストールでポイント獲得(2,800円相当) | \iphone専用/ |
【モニタータウン |
かんたん登録1分、設定5分、会員登録無料!現金かギフトカードに交換 | アプリインストールでポイント獲得(2,800円相当) | \Android専用/ |
【モニタータウン】 |
かんたん登録1分、設定5分、会員登録無料!現金かギフトカードに交換 | アプリインストールでポイント獲得(900円相当) | \PC専用/ |
【ハピタス】  |
お買い物やサービスの申し込みでポイントを貯めて、現金やギフト券に交換 | 会員登録時・500ptをプレゼント | \会員80万人/ |
スマホと紹介コードが必須!
スマホで銀行口座を開設するだけでおこづかいゲット!
| かんたん!【スマホ専用】無料の銀行口座開設でお小遣いをゲット | |||
| 銀行名 | 報酬額 | 紹介コード | 無料口座開設(スマホ必須) |
第一生命NEOBANK |
¥1,500 | oFFWZrM | 第一生命NEOBANK |
みんなの銀行 |
¥500 | hYBchqNL | みんなの銀行 |
UI銀行 |
¥500 | sh4402 | UI銀行 |
女性限定のお金稼ぎ!
在宅OKのかんたん美容モニタや、チャットレディ
| 【女性限定】かんたん!即金!お小遣い稼ぎができる在宅ワーク | |
【女性専用!美容モニター】 |
エステだけでなく、コスメや健康食品などを試せる在宅ワークのモニターも多数!「ファンモニ」(無料)会員登録はこちら 謝礼は1件1000円~5,000円ほど、複数組合わせれば月4万円以上も可能 |
【女性専用!在宅で稼ぐ】 |
自分の好きなタイミングで稼げるFANZAの在宅チャットレディ! ノンアダルトだから安心!スマホでかんたん在宅ワーク 時給7,500円以上可、安心の個人情報対策、最短翌日振込! |
ファクタリングなら!
あなたの持っている債権を買取ります!
| ファクタリング | 即日融資 | 手数料 | 申込み |
1.アクセルファクター |
来店不要 最短2時間!即日融資 |
買取手数料0.5%~ 審査通過率 93.3%以上 |
\個人・法人/ |
2.資金調達プロ |
かんたん10秒! 無料診断 最短即日融資 |
提携事業者数No1! 資金繰り改善率93%以上 |
\個人・法人/ |
3.株式会社No.1 |
最短30分で即日振込可能 | 買取手数料1%~(業界最安) 審査通過率 90%以上 |
\個人・法人/ |
4.エスコム |
最短即日で審査完了。 即日に資金調達可能。 |
1.5%〜12% 資金化成功率97% |
\個人・法人/ |
5.Easy factor |
最短10分でお見積り 最短60分で振込可能 |
2%〜8% 資金化成功率97% |
\個人・法人/ |
6.いーばんく |
来店不要 最短即日入金可能 |
買取手数料4%~ 審査通過率 90%以上 |
\個人・法人/ |
7.ジャパンマネジメント |
最短即日で審査完了。 翌日に資金調達可能。 |
三社間(3%~10%) 二社間(10%~20%) 資金化成功率93% |
\個人・法人/ |
8.PayToday |
最短30分で審査完了。最短45分で振込可能。 | 1%〜9.5%(上限) | \個人・法人/ |
9.MSFJ |
来店不要 最短1日で買取可能 |
1.8%〜9.8% 累積実績1万件以上 |
\個人・法人/ |
10.トラストゲートウェイ |
来店不要 最短即日振込 |
1.5%〜9.5%(業界最安水準) 審査通過率95% |
\個人・法人/ |
11.トップ・マネジメント |
来店不要 最短即日振込 |
3社間ファクタリング(買取対象債権の99.5%〜96.5%) 2社間ファクタリング(買取対象債権の96.5%〜87.5%) |
\個人・法人/ |
12.西日本ファクター |
最短即日即買取り 診断無料 |
【九州、中国、四国エリアに限定】 手数料は2.8%〜 |
個人・法人(九州、中国、四国) |
13.三共サービス |
来店不要 資金化まで最短翌日 |
平均手数料8% 資金化成功率97% |
\法人のみ/ |
14.ネクストワン |
来店不要 資金化まで最短即日 |
1.5%〜10%(業界最安水準) | \法人のみ/ |
15.ラボル |
来店不要 最短30分入金 |
買取額の10% 振込手数料などの費用なし |
\個人事業主のみ/ |
16.請求書先払い |
最短60分でお振込み 対面不要 |
手数料3%〜10% 最低買取金額10万円 |
\個人事業主のみ/ |
クレカの現金化サービスなら、即日にも対応してくれます!
| 社名 | 即日融資 | 実質年率 | 限度額 | 特徴 |
| 1.クレカ現金化「プライムウォレット」 |
最短10分 | 還元率最大98% | 設定なし | ・24時間受付 ・土日祝日も即日振込 ・カード事故過去0件 |
2.クレカ現金化「インパクト」 |
最短5分 | 還元率最大99.5% | 設定なし | ・審査不要 ・土日祝日も即日振込 ・来店不要 |
3.クレカ現金化「あんしんクレジット」 |
最短3分 | 還元率最大99.5% | 設定なし | ・審査不要 ・土日祝日も即日振込 ・来店不要 |
4.クレカ現金化「Quick現金サービス」 |
最短20分 | 還元率最大90%(手数料無料) | 設定なし | ・24時間365日受付 ・土日祝日も即日振込 ・審査不要 |
5.クレカ現金化「どんなときもクレジット」 |
最短5分 | 還元率最大98% | 設定なし | ・24時間受付 ・土日祝日も即日振込 ・スマホで申込完結 |
QUICK39のキャッシングローン紹介 |
お金を貸してくれるトコロを見つけます。 どこからも借りれない・・金利が高くもっと安いところへ借り換えしたい・・こんな悩みを解消します。 |
・完全無料 ・紹介料無料 ・手数料無料 |
||
1.フクホー |
対応 | 7.3%〜18.0% | 1〜200万円 | ・24時間受付 ・来店不要 ・利息は利用日数分だけ |
2.スカイオフィスキャッシング |
対応 | 15.0%〜20.0% | 1〜50万円 | ・24時間受付 ・来店不要 ・最短30分で審査完了 |
3.キャレント |
対応 ※ | 7.8%〜18.0% | 1万円~500万円 | ・24時間受付 ・来店不要 ・申込まで3分で完了 |
4.アロー |
対応 | 15.0%〜19.94% | 200万円まで | ・24時間受付 ・来店不要 ・かんたん3秒診断 |
5.アルコシステム |
対応 | 15.0%〜20.0% | 1〜50万円 | ・24時間受付 ・来店不要 ・保証人・担保不要 |
6.プラン |
対応 | 12.00%~18.00% | 1〜50万円 | ・24時間受付 ・来店不要 ・保証人・担保不要 |
7.クレジットのニチデン |
対応 ※ | 7.3%〜17.52% | 1〜50万円 | ・24時間受付 ・来店不要 ・100日間利息なし(初回のみ) |
8.いつも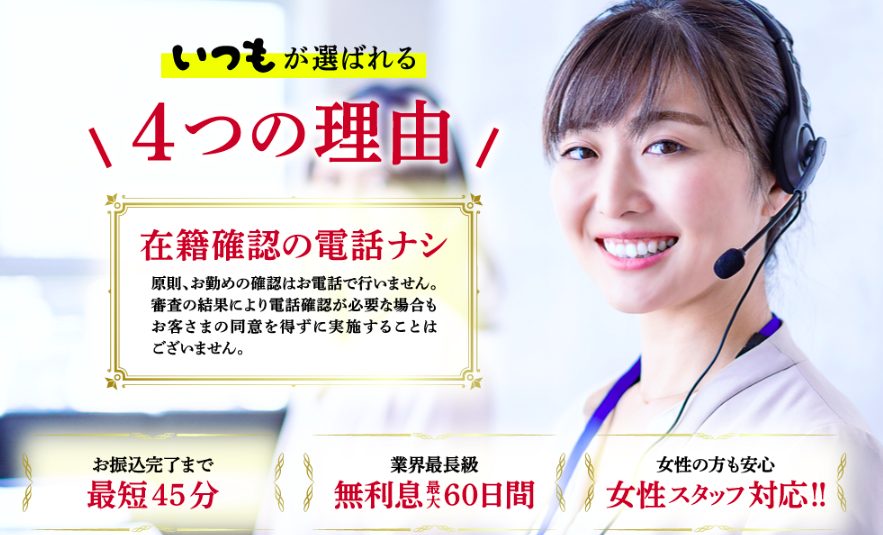 |
対応 | 4.8%~18.0% | 1万円~500万円 | ・24時間受付 ・来店不要 ・最大60日間利息なし(初回のみ) |
9.フタバ |
対応 | 14.959%~19.945% | 1万円~50万円 |
・24時間受付 |
10.セントラル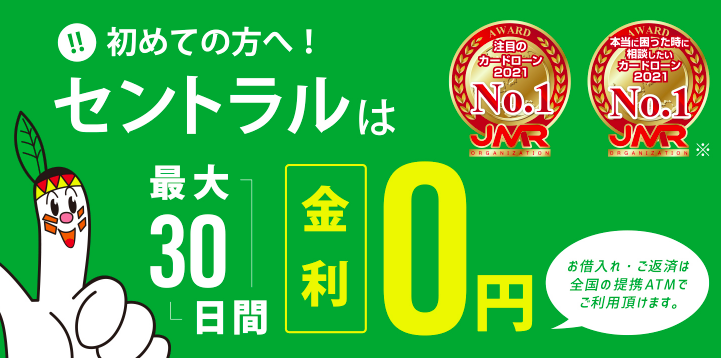 |
対応 |
4.8%~18.0% |
1万円~300万円 | ・24時間受付 ・最大30日間利息なし(初回のみ) ・セブン銀行ATMでご利用ご返済が可能 |
11.ハローハッピー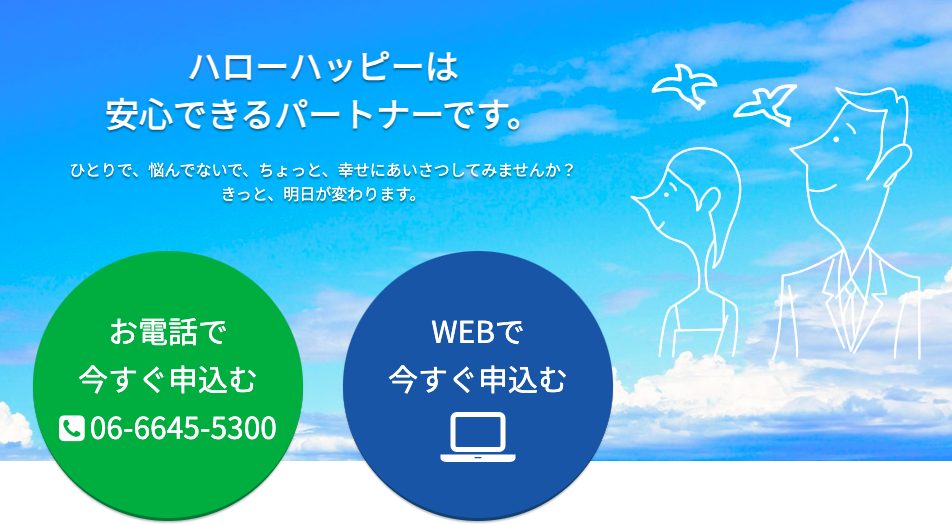 |
対応 | 10.00%~18.00% | 100万円まで | ・24時間受付 ・来店不要 ・保証人・担保不要 ・パート・アルバイト・主婦の方も歓迎 |
12.マイレディス |
対応 | 4.80%〜18.00% | 1万円〜100万円 | ・24時間受付 ・来店不要 ・保証人・担保不要 ・女性専用キャッシング |
| 【女性専用!在宅で稼ぐ】 |
自分の好きなタイミングで稼げるFANZAの在宅チャットレディ! ノンアダルトだから安心!スマホでかんたん在宅ワーク 時給7,500円以上可、安心の個人情報対策、最短翌日振込! |
|||
13.オージェイ |
対応 | 9.5%〜18.0% | 10万円~5,000万円 | ・24時間受付 ・来店不要 |
14.アクト・ウィル |
対応 | 7.5%〜15.0% | 300万円~1億万円 | ・24時間受付 ・来店不要 ・審査は最短60分 |
15.ファンドワン |
対応 | 2.5%〜18.0% | 30万円~1億円 | ・24時間受付 ・来店不要 ・審査は最短40分 |
16.MRF |
対応 | 4%〜15.0% | 30万円~3億円 | ・24時間受付 ・来店不要 ・24時間以内に仮審査 |
※ 平日14時までの手続完了が条件
激甘審査の絶対すぐ借りれる街金(消費者金融)をご紹介します。
どの消費者金融も独自審査を採用しており、柔軟な対応をしてくれるのでブラックでも借りれて即日融資OKの可能性が高いです。
ブラックだからと諦めずに真剣にお金が必要な理由を説明して少しでも融資をしてもらえる確率をあげましょう。
またクレジットカードを現金化してくれる優良サービス店も合わせてご紹介します。
1.クレジットカード現金化【プライムウォレット】選ばれ続ける超優良店
ショッピング枠現金化業界で超有名で誰もが知っているプライムウォレット!
現在日本でも、キャッシュレス化が進んでおりクレジットカードを保有する方は増えておりますね♪
15時以降でも即日振込み可能で、地方銀行もOKです。

2.クレジットカード現金化【インパクト】最短5分で振込完了
インパクトは、超高還元率(最高99.5%)でしられるクレジットカード現金化優良店です。
さらに新規申込で2%換金率UP!
審査不要、来店不要で最短5分でお振込み。
クレジットカードのショッピング枠があれば現金化してくれる安心の優良店です。
3.クレジットカード現金化【あんしんクレジット】業界最高クラスの還元率
あんしんクレジットは、超高還元率(最高98.8%)でしられるクレジットカード現金化優良店です。
審査不要、来店不要で最短5分でお振込み。
クレジットカードのショッピング枠があれば現金化してくれる安心の優良店です。
4.クレジットカード現金化【Quick現金サービス】とにかく早い!

Quick現金サービスは、振込金額を最初に提示する優良現金化サービスです。
24時間WEB対応やLINEチャットなど、お客様目線のサービスを提供し続けてリピーターは脅威の90%以上!
急な出費でお金が足りない!そんな方でも大丈夫!
5.クレジットカード現金化【どんなときもクレジット】初めての方、換金率3%UP

急な出費で困っていませんか?
どんなお悩みも、どんなときもクレジットにお任せください。
お申込みが初めての方なら換金率3%アップ!
審査不要、来店不要で今すぐ現金化してくれる安心サービスです。
【QUICK39】お金を貸してくれるところをご紹介

消費者金融からの借り入れが多数あってどこからも借りれないと思っている方や 金利が高くてもっと安いところへ借り換えしたい方・・・
このような悩みを抱えたお客様にたいして 安心して安全でより安く借り入れが出来るようにサポートさせていただいております。
完全無料ですのでお客様から紹介料・手数料等の料金は一切いただいておりません。

1.【フクホー】ゆとりのローン!安心の金利7.30%〜
★創業45年★
キャッシング・消費者金融のフクホー 安心の金利7.30%〜!
最高200万円までのゆとりのローン。
キャッシング・消費者金融・ローンなら創業45年のフクホー。
ご来店一切不要、振込み キャッシングの消費者金融です。
レディースキャッシングもご用意しているので、女性の方でも安心してご利用頂けます。
2.【スカイオフィスキャッシング】スピードと信頼の消費者金融
最短30分!来店不要 スピードキャッシング!!受付は24時間可能!
当日 9:00〜14:00 までにお申込み頂きますと、 即日のお振込みが可能です。
スカイオフィスニッセイキャッシングは他社で断られた方でも柔軟に対応している消費者金融です。
インターネットから申込みを行い、審査が完了すればその日に融資を受けられます。
来店不要のスピードキャッシングは急な出費でお困りの方の力強い味方です。

3.【キャレント】で借りんと!融資申込みキャンペーン中!
インターネット専用キャッシング♪完全非対面でネット完結。
カード発行不要!全国どこでもご指定の銀行口座にお振込み致します。
担保、保証人不要でキャッシングが可能です。
インターネット申込み、365日、24時間受付中!
申込フォームの入力内容が少なく、簡単にお手続きいただけます♪
ご利用限度額は【1万円〜500万円】まで。
大手消費者金融、カードローンの審査が通らなかった方でも柔軟な審査で対応致します。

4.【アロー】最短即日融資もOK
無担保かつスピーディーな使途自由ローンです。
・独自審査
・来店不要
・最短即日振込
・アプリならWEBで完結、郵送物は一切なし!
「郵送物が一切不要なアローWEB完結ローン」の取扱いを開始いたしました。
お申込み後、一次審査が通過した方は、スマホでアプリをダウウンロードして頂くことで、 サービスをご利用いただくことができます。

5.【アルコシステム】信頼と実績のキャッシング
創業1983年、信頼と実積、振込キャッシングの老舗です。
お申し込み後、最短でその日のうちにご指定口座に送金いたします。
貸付利率(実質年率) 年3.00%~20.00%
保証人・担保不要。
ご融資範囲 50万円まで(要審査)
お申し込みはWEBで、24時間受付中。

6.【プラン】全国どこからでも24時間簡単ご契約

全国どこからでも24時間ネットでお申し込みからご契約まで可能です。
又、キャッシュサービス『プラン』では1万円から最高50万円までご融資可能です。
・ご来店不要
・最短即日ご融資可能
・担保・保証人不要
・月々2,000円からのご返済も可能
7.【クレジットのニチデン】簡単・便利なネットキャッシング
 簡単・便利・ネットキャッシング ニチデンのネットキャッシングへようこそ。
振込ローン・不動産担保ローン・事業者ローンをご用意しています。
学生ローンにも対応、20歳以上で定期的に収入のある方を対象としております(パート・アルバイト・主婦の方も歓迎します)
大学生〜幅広い層に対応しており、福山、福山と3店舗ありますので手厚いサービスをモットーとして運営しています。
8.【いつも】いつものキャッシング
『早い』 来店不要!24時間申込受付、最短45分でお振込完了。
『頼れる』ご利用は1万円〜最大500万円まで。
『便利』 カード発行不要!郵送物一切なし!お客さまに合わせた柔軟な在籍確認。
『安心』 LINEやメール・電話でご対応、ご融資まで完全サポート。
『納得』 電話応対コンクールにて数度入賞した丁寧なご対応。

9.借りやすくて返しやすい!キャッシング【フタバ】
創業50年以上の実績と信頼のキャッシングのフタバです。
・来店不要・即日振込みキャッシングです。
・インターネット申込みで24時間全国受付
・お申込みはとっても簡単、お申込みフォームに入力するだけ。
・過去に自己破産・債務整理等された方もまずはお申込みください。
・大手消費者金融やカードローンの審査が通らなかった方もお申込みください。
・女性スタッフが対応致します。

10.来店不要・振込キャッシング【パーソナルクレジット セントラル】
<<創業40年を超える安心と実績の「セントラル」>>
WEB申込で当日最短融資可能です!
全国の皆さまからのお申込みに対応いたします。
セントラルは昭和48年創業の老舗の貸金業です。
全国に17店舗展開しております。 東京都内4店舗(浅草、新橋、新宿、池袋)、埼玉と神奈川に各1店舗 愛媛6店舗、香川2店舗、高知1店舗、岡山2店舗 計17店舗展開。
全国のセブン銀行ATM提携を開始し、 全国の方々にもますますご利用していただきやすくなりました。
さらに、ご利用が初めての方は最大30日間金利0円!

11.安心できるパートナー【ハローハッピー】フリーローン
ハローハッピーは身近なキャッシング!
20歳以上で定期的に収入のある方を対象としております(パート・アルバイト・主婦の方も歓迎します)
家電ローン:家電製品のご購入
教育ローン:保育園〜大学の学費
リフォームローン:ご自宅の増改築・修理
医療ローン:入院、通院費 事業資金ローン
事業資金ローン:自営業、学資資金
ハローハッピーは各都道府県の方々へのサービスが手厚いお店です。

12.来店不要・振込キャッシング【女性専用 マイレディス】

<<創業40年を超える安心と実績の「セントラル」>>
そんなセントラルから生まれた女性専用のキャッシング【マイレディス】
WEB申込で当日最短融資可能です!
全国の皆さまからのお申込みに対応いたします。
中四国中心に店舗展開の老舗セントラルは、首都圏店舗も拡充中!
全国のセブン銀行ATM提携を開始し、 全国の方々にもますますご利用していただきやすくなりました。
さらに、ご利用が初めての方は最大30日間金利0円!

女性専用!在宅で稼ぐ【FANZAノンアダルトチャットレディ募集】

自分の好きなタイミングで稼げる在宅チャットレディ。
ノンアダルトだから安心、スマホで出来るかんたん在宅ワークです。
初めての方でも「業界最大手」「FANZAだから安心」してお仕事できます。
高収入在宅アルバイトならFANZAチャットガール!
隙間のお時間でお仕事可能、副業としても大歓迎です。
万全の個人情報管理、時給7,500円以上可、最短翌日振込!

愛媛県(松山)の街金|サービス対象地域について
愛媛県松山市には、地域密着型の街金(消費者金融)が数多く存在し、地元の人々の資金ニーズに応えています。
銀行の審査に通りにくい方や、急な出費が必要な方にとって、街金は頼りになる存在です。
本記事では、松山市の街金が対応する地域や、サービス内容について詳しく解説していきます。
街金(消費者金融)とは?
街金(消費者金融)は、銀行や大手消費者金融と異なり、比較的小規模な貸金業者のことを指します。 特に松山市の街金は、地元の事情を理解し、柔軟な融資を行うことが特徴です。
街金のメリット
- 即日融資が可能な場合が多い
- 少額の融資にも対応
- 審査が比較的柔軟で、アルバイトやパートの方でも利用しやすい
- 地域に根ざしたサービスを提供している
ただし、金利は銀行よりも高めに設定されることが多いため、借入れの際は慎重に検討しましょう。
松山市の街金が対応するエリア
松山市の街金は、市内全域はもちろん、近隣地域にもサービスを提供しています。
1. 松山市中心部
松山市の中心部は、商業施設やオフィスが多く、街金の店舗も充実しています。
- 大街道・銀天街エリア:松山の繁華街で、買い物客も多い。
- 千舟町・勝山町エリア:オフィス街が広がり、会社員の利用が目立つ。
- 松山市駅・JR松山駅周辺:交通の利便性が高く、出張者や観光客の利用もある。
2. 松山市郊外
市内中心部から少し離れたエリアにも、街金のサービスを利用できる店舗があります。
- 余戸・古川エリア:住宅街が広がる地域で、ファミリー層の利用が多い。
- 鷹子・久米エリア:松山市の東部に位置し、公共交通のアクセスも良い。
- 北条・堀江エリア:松山市北部にあり、地域密着型の街金が点在。
3. 松山市周辺地域
松山市に隣接する市町村でも、松山市の街金を利用できる場合があります。
- 伊予市:松山市に隣接し、松山の街金を利用する人が多い。
- 東温市:松山市の東側に位置し、住民の通勤圏内。
- 砥部町:松山市に隣接し、金融機関の選択肢が少ないため街金の利用者も。
街金を利用する際のポイント
街金を利用する際は、以下の点に注意しましょう。
1. 金利と返済計画をしっかり確認
街金の金利は大手金融機関よりも高めです。 そのため、事前にしっかりと返済計画を立てることが重要です。
2. 正規の業者を選ぶ
違法な闇金業者を避けるため、必ず金融庁に登録されているかを確認しましょう。 登録番号を公式サイトなどでチェックするのもおすすめです。
3. 必要書類を事前に準備
申し込みをスムーズに進めるため、必要書類を事前に用意しましょう。
| 必要書類 | 具体例 |
|---|---|
| 本人確認書類 | 運転免許証、マイナンバーカードなど |
| 収入証明書 | 給与明細、確定申告書など |
| 口座情報 | 振込融資を希望する場合 |
4. 無理のない借入れを心がける
借入額は必要最小限に抑え、余裕をもった返済計画を立てることが重要です。
街金の申し込み方法
松山市の街金では、以下の方法で申し込むことができます。
1. 店舗での申し込み
直接店舗に行って申し込む方法です。 スタッフと相談しながら進められるため、初めての方におすすめです。
2. 電話での申し込み
事前に電話で相談し、必要書類を確認して申し込むことができます。
3. オンライン申し込み
インターネットを利用し、スマホやパソコンから申し込む方法です。 来店の手間を省きたい方に向いています。
街金を選ぶ際のチェックポイント
松山市で街金を利用する際は、以下の点を確認しましょう。
- 金利が適正かどうか
- 口コミや評判が良いか
- 即日融資に対応しているか
- 返済方法が柔軟か(銀行振込、コンビニ支払いなど)
計画的な利用を心がけよう
街金は、正しく利用すれば急な資金調達の強い味方になります。
無理のない範囲で借入れを行い、計画的に返済を進めましょう。
愛媛県松山市には、多くの街金があり、地域の人々の生活を支えています。 それぞれのサービスを比較しながら、自分に合った業者を選ぶことが大切です。
愛媛県(松山)の激甘審査の街金を探すときの注意点
愛媛県(松山)には、多くの街金(消費者金融)が存在しており、その中には「激甘審査」を売りにしているところも少なくありません。
急にお金が必要な時、審査が緩いことで知られる街金を利用するのは便利な選択肢かもしれませんが、注意しなければならない点も多いです。ここでは、愛媛県(松山)の激甘審査の街金を探す際の注意点について詳しく解説していきます。
1. 高金利に注意する
街金(消費者金融)の中には、激甘審査を提供する代わりに、金利が高めに設定されていることがあります。
審査が簡単だからといって、無理に借り入れを行ってしまうと、後々大きな負担になることもあります。特に、金利が20%やそれ以上になることも少なくありません。
高金利の影響
例えば、10万円を借りた場合、年利20%で計算すると、1年後には12万円を返済しなければなりません。
この差額2万円が金利部分にあたります。このように、金利が高いと借り入れ金額以上に返済額が増えてしまい、返済が困難になる可能性が高くなります。
そのため、金利がどの程度かを事前にしっかり確認することが重要です。また、少額の借り入れでも金利が高い場合、長期間返済していくうちに大きな負担となりますので、慎重に借り入れを行う必要があります。
2. 利用目的を明確にする
街金を利用する前に、なぜ借り入れが必要なのかを明確にしておくことが大切です。
急な支出や一時的な資金繰りに利用するのはよいですが、生活費を補うために安易に借りてしまうと、後々返済に困ることになります。
借り入れの目的が明確であれば、必要な金額を計算し、無駄な借入を避けることができます。例えば、10万円が必要なのか、50万円が必要なのかをしっかりと見極めてから借り入れを行うことが重要です。
3. 返済計画を立てる
街金を利用する際には、返済計画を立てることが最も重要なステップです。
特に金利が高い場合、返済計画を立てずに借り入れると、返済額が膨らみ、最終的に返済不能になるリスクがあります。借りた金額と返済額のバランスをしっかりと見極めて、計画的に返済を進めていきましょう。
返済計画の作り方
-
毎月の支出を計算する: 借りたお金を返すためには、毎月の収支を見直す必要があります。
-
生活費を差し引いた余剰金を返済に充てることになりますので、まずは月々の支出をしっかり把握しておきましょう。
-
返済額を設定する: 返済額が高すぎても生活に支障をきたすため、無理なく返せる金額を設定します。返済にあたる金額は、収入と支出に見合ったものを選ぶことが大切です。
-
返済期間を決める: 返済期間が短ければ金利負担は少なくなりますが、毎月の返済額が高くなります。逆に、返済期間を長くすれば、月々の返済額は軽くなりますが、金利分が多くかかってしまいます。どちらが自分にとって最適かを考えて決定します。
4. 手数料や追加費用の確認
契約前に、金利だけでなく手数料やその他の追加費用についてもしっかりと確認しましょう。
街金(消費者金融)によっては、契約時に初回手数料や事務手数料が発生することもあります。また、借りた後に発生する延滞手数料や追加の費用がある場合もありますので、これらの点を見逃さないようにしましょう。
よくある手数料
- 契約手数料: 契約時に発生する場合があり、契約を結ぶ前に確認しておく必要があります。
- 遅延損害金: 返済が遅れると、遅延損害金が発生します。これも契約内容に含まれていることが多いので、事前に理解しておくことが重要です。
- 借入時の事務手数料: 一部の街金では、借入の際に事務手数料を請求することがあります。
契約書にしっかりと記載されている内容をよく読み、不明点があれば担当者に確認することをおすすめします。
5. 業者の信頼性を確認
激甘審査を提供している業者はたくさんありますが、中には悪徳業者や不正行為を行っている業者も存在します。
そのため、業者の信頼性を確認することがとても重要です。
インターネットでの口コミや評判をチェックし、実際に利用した人の意見を参考にすることが役立ちます。
信頼性の確認方法
- 口コミやレビューの確認: 利用者の体験談を読んで、業者の信頼性や対応の良さを確認しましょう。ただし、口コミには偏りがあることもあるので、複数のサイトを参考にするのが良いです。
- 公式サイトの確認: 公式サイトに記載されている情報や、運営会社の情報がしっかりしているかどうかも重要です。悪質な業者は、公式サイトの情報が曖昧であったり、連絡先が不明確な場合があります。
6. 複数の業者を比較する
愛媛県(松山)には多くの街金(消費者金融)が存在しますが、それぞれに条件や利便性が異なります。
借り入れを行う前に、複数の業者を比較して、最も条件が良いところを選ぶことが大切です。特に金利や返済条件、手数料などを比較し、最適な業者を見つけるようにしましょう。
比較のポイント
- 金利や利息の設定: 業者ごとに金利が異なるため、比較して最も低い金利を選ぶようにしましょう。
- 返済条件: 返済期間や返済額の柔軟性を確認し、自分の返済能力に合った業者を選びます。
- 手数料や隠れたコスト: 利用にかかる総費用がどれくらいかを確認しましょう。金利だけでなく、手数料なども含めてトータルで比較することが大切です。
愛媛県(松山)で激甘審査の街金を利用する際には、事前に十分な情報収集を行い、金利や返済計画、手数料などをしっかりと確認することが大切です。
無理なく返済できる範囲で利用し、トラブルを避けるためにも慎重に業者を選びましょう。
愛媛県(松山)の激甘審査の街金は審査が甘い
愛媛県(松山)の街金(消費者金融)には、他の金融機関と比較して「審査が甘い」と言われる特徴があります。
急な資金が必要なときに、簡単に融資を受けられるため、便利な存在として利用されることが多いですが、甘い審査が意味することをよく理解した上で利用することが大切です。
そもそも街金とは?
街金(消費者金融)とは、主に個人向けの融資を行う金融機関のことを指します。
一般的に、街金は中小規模の金融機関で、大手銀行や大手消費者金融と異なり、規模が小さいため、柔軟な対応が可能であることが多いです。特に、街金は審査基準を比較的緩くしているため、通常の金融機関では融資が難しいとされる人でも融資を受けられることがあります。
街金では、少額の融資を迅速に提供することを得意としており、急な支出や生活費の不足などに対応できるため、多くの利用者がいます。
愛媛県(松山)の街金の特徴
愛媛県(松山)には数多くの街金が存在しており、それぞれに特徴がありますが、共通して言えるのは、「審査が甘い」とされる点です。
審査が甘いということは、審査基準が緩やかで、融資を受けやすいということですが、その理由はさまざまです。
1. 少額融資が主流
街金は基本的に少額融資を得意としています。
例えば、数万円から数十万円程度の融資が多く、返済額も比較的少ないため、返済の負担が少ないのが特徴です。少額融資の場合、審査が緩くなることが多いですが、それでも返済能力を考慮し、貸し倒れリスクを減らすための工夫がされています。
2. 収入や職業に対して柔軟な審査
街金の審査は、他の大手金融機関と比べて、収入や職業に関して柔軟に対応している場合が多いです。
例えば、アルバイトやパートなど不安定な職業に就いている場合でも、安定した収入があれば融資が受けられる可能性があります。銀行や大手消費者金融では、正社員や安定した収入を持つ人が優先されるため、職業に対する柔軟性が街金の特徴です。
3. 他社借入に対する寛容さ
他社で借入がある場合、銀行や大手消費者金融では審査が厳しくなることが多いですが、街金では他社借入があっても、融資が通る場合があります。
街金は少額融資を得意としているため、他社での借入状況に関しても、融資を行う基準が緩やかなことが多いです。
街金のメリット
街金には、審査の甘さ以外にも多くのメリットがあります。
急にお金が必要な時や、急な支払いが発生した際に、大変便利に利用できることが多いです。
1. 即日融資が可能
街金の最大のメリットは、即日融資を受けられる点です。
急にお金が必要になった場合でも、街金は他の金融機関と比較して迅速に融資を行うことができます。申込みをしてから、審査が終わり、すぐにお金を受け取ることができるため、急な支出にも対応できます。
2. 融資の手続きが簡単
街金では、融資の手続きが非常に簡単です。
必要な書類や手続きが最小限で済むため、非常に便利です。例えば、勤務先の証明書や収入証明書が不要な場合もあり、申し込みの際に必要な書類を揃える手間が少なくて済みます。また、最近ではインターネットで申し込める街金も増えており、オンラインで手軽に申請することが可能です。
3. 少額でも対応可能
街金では、少額の融資を受けることができるため、あまり多くのお金が必要ない場合でも利用しやすいです。
生活費やちょっとした買い物のために、少額で融資を受けることができるため、日常的に利用できる便利な存在となっています。
街金利用時の注意点
街金の審査が甘いという点は、確かに便利でありますが、その分注意すべき点もあります。
安易に借りてしまうと、後々トラブルに発展する可能性もあるため、慎重に利用することが大切です。
1. 高い金利
街金の最大のデメリットは、高金利です。
審査が甘いため、貸し手のリスクをカバーするために金利が高めに設定されることが多いです。例えば、金利が年率20%を超える場合もあります。これは、銀行などの金融機関に比べて非常に高い金利であるため、借り過ぎると返済が大変になる可能性があります。
2. 返済の負担
高い金利が適用されるため、返済の負担も増える可能性があります。
返済額は金利によって変動するため、返済計画を立てる際には十分に考慮する必要があります。無理に返済期限を短く設定してしまうと、負担が増し、返済が困難になることがあります。
3. 借り過ぎに注意
街金は審査が甘いので、つい借りすぎてしまうことがあります。
借り入れの際には、自分の返済能力をよく考慮し、必要最低限の金額だけを借りるようにしましょう。借り過ぎると、返済が滞る原因となり、金利や延滞金が積み重なっていく可能性があります。
愛媛県(松山)の激甘審査の街金は在籍確認なしか
急にお金が必要になることがあります。
そんな時、街金(消費者金融)のサービスを利用することを考える人も多いでしょう。
愛媛県(松山)の街金には、「激甘審査」や「在籍確認なし」など、便利で利用者にとって非常に助かるサービスが多くあります。
在籍確認なしの融資は、特にプライバシーを重視する方にとって大きな魅力となっています。
在籍確認とは?
在籍確認とは、消費者金融が融資を行う際、申込者が実際に勤務しているかどうかを確認するための手続きです。
通常、貸金業者は申込者の返済能力を確認するため、勤務先に電話をかけ、在籍していることを確認します。この確認作業は借り手のプライバシーを侵害する可能性があり、特に職場での借金が知られることを避けたいと考える人々にとっては大きな懸念材料となります。
愛媛県(松山)の街金が在籍確認なしで融資する理由
愛媛県(松山)の一部の街金では、在籍確認を行わずに融資を提供するサービスがあります。
このようなサービスが成り立つ理由として、いくつかの要因が挙げられます。
1. 融資額の制限
在籍確認なしで融資を行う場合、貸し出される金額は通常、少額であることが多いです。
例えば、数万円から十数万円程度の融資が一般的です。少額の融資では、借り手の返済能力を完璧に確認しなくても、リスクが低いとみなされるため、在籍確認が省略されることがあります。
2. 代替的な審査方法
街金によっては、在籍確認の代わりに他の方法で審査を行うことがあります。
例えば、銀行口座の取引履歴を確認したり、給与明細を提出させたりする方法です。これにより、借り手の返済能力を他の形で証明することができ、在籍確認なしでも融資が可能となります。
3. 素早い融資を提供するため
街金の多くは「即日融資」や「最短30分で融資決定」など、スピーディーな対応を強みとしているため、在籍確認の手続きを省略することがあります。
これにより、手続きが簡素化され、借り手は素早くお金を手に入れることができます。急な支出が必要な場合、この速さが非常にありがたいポイントとなります。
在籍確認なしの街金のメリット
在籍確認なしで融資を受けることには、いくつかの大きなメリットがあります。
1. プライバシーが守られる
在籍確認がない一番のメリットは、借り手のプライバシーが守られる点です。
職場に電話がかかることがないため、借金の事実を知られずに済みます。これにより、職場の人間関係や社会的な立場を気にせずに融資を受けることができるため、非常に安心です。
2. 審査がスムーズ
在籍確認を省略することによって、融資の審査がスムーズに進みます。
通常の審査では、勤務先に連絡を取る必要があるため、その分の時間がかかりますが、在籍確認なしの場合、その手間が省けるため、融資の決定までが早くなります。即日融資を希望する方にとっては、このスピード感は大きな魅力です。
3. 簡単な手続き
在籍確認なしの融資を提供している街金では、申し込みから融資までの手続きが簡単で、非常に効率的です。
必要書類の提出や審査の手続きもシンプルで、誰でも気軽に申し込みができるのが特徴です。この手軽さが、急な資金調達を希望する人々にとって非常に便利です。
在籍確認なしで融資を受けるデメリット
一方、在籍確認なしで融資を受けることには、いくつかのデメリットもあります。
1. 高い金利
在籍確認を省略することで、貸金業者はリスクを回避するために金利を高めに設定することが多いです。
特に融資額が少額の場合、その金利は一般的に高くなる傾向があります。金利が高いと、返済時に支払う総額が増えるため、返済計画をしっかり立てることが重要です。
2. 融資額に制限がある
在籍確認なしで融資を受ける場合、融資額に制限があることがほとんどです。
大きな額を借りたい場合、在籍確認なしでは融資を受けられないこともあります。多くの街金では、融資額を少額に限定することで、リスクを減らす仕組みをとっています。
3. 返済能力の確認が不十分
在籍確認なしで融資を受ける場合、借り手の返済能力を十分に確認する手段が限られているため、リスクが高まります。
特に収入が不安定な人や他の借入がある人にとっては、返済の負担が増す可能性があるため、慎重に判断する必要があります。
愛媛県(松山)の激甘審査の街金は総量規制オーバーでも借りれるか?
愛媛県(松山)での消費者金融(街金)は、その「激甘審査」が話題になっています。
これらの業者は、通常の金融機関に比べて融資のハードルが低く、借り入れを希望する多くの人々にとって魅力的に映ります。
しかし、総量規制という法律が存在しているため、実際には融資が受けられない場合もあります。この規制をオーバーしてしまった場合、果たして愛媛県(松山)の激甘審査の街金でお金を借りることができるのでしょうか?今回はその点をわかりやすく解説します。
1. 総量規制とは?
総量規制は、消費者金融を含む貸金業者が個人に貸し出す際に設けられた制限です。
これによって、借り手が過剰に借り入れをしないようにすることを目的としています。具体的には、借り手の年収の3分の1を超える金額を借りることができません。
例えば、年収300万円の人は、最大で100万円までしか借りることができないという制限があります。これは、借り手が無理なく返済を行える範囲で融資を受けられるようにするためのルールです。
1.1 総量規制が適用される融資の範囲
総量規制は、以下のような借り入れに適用されます:
- 消費者金融(街金)
- カードローン
- クレジットカードのキャッシング
- その他、消費者向けのローン全般(自動車ローン、ショッピングローンなど)
これらの借り入れは、すべて総量規制の対象となり、年収の3分の1を超える融資は基本的に行われません。
2. 激甘審査の街金とは?
愛媛県(松山)の激甘審査の街金は、他の消費者金融よりも審査基準が柔軟なことが特徴です。
例えば、他社で断られた方や、過去に金融事故があった人でも融資を受けやすいという特徴があります。これらの街金は、個別の状況に応じて、貸し出しの判断をすることが多いです。
そのため、普通の銀行や大手消費者金融で借り入れを断られてしまった方にとって、愛媛県(松山)の街金は非常にありがたい存在であると言えます。しかし、いくら審査が甘いと言っても、総量規制をオーバーしてしまっている場合は融資が受けられるのでしょうか?
3. 総量規制オーバーでも借りられる場合はあるのか?
基本的に、総量規制を超えて融資を受けることは難しいです。
しかし、特定の状況や方法によって、総量規制をオーバーしてしまっても融資が受けられる可能性があります。ここでは、いくつかの方法を紹介します。
3.1 配偶者の収入を合算する
総量規制は、基本的に申込者本人の年収を基に計算されます。
しかし、配偶者がいる場合、その配偶者の収入を合算することができる場合があります。これにより、年収の3分の1の上限が引き上げられることになり、融資額を増やすことができます。
たとえば、年収300万円の方が配偶者の年収200万円を合算した場合、年収500万円として計算され、融資額は最大で166万円まで可能になります。この方法を利用すれば、総量規制オーバーでも融資を受けることができる場合があります。
3.2 他の借り入れを完済する
もし他の消費者金融やクレジットカードで借り入れをしている場合、その借り入れを完済することで、新たに融資を受けられる可能性があります。
借り入れの返済を終えた後に、新たに借り入れができるようになります。借り換えローンやリファイナンスを利用して、金利が低いところに借り換えることも一つの方法です。
3.3 少額の融資を選ぶ
総量規制を超えた融資は難しいですが、少額の融資を希望する場合は、規制内で借りられることがあります。
例えば、少額のキャッシングや短期融資は、規制の範囲内であれば問題なく借りることができます。
街金でも、少額の融資を取り扱っている業者が多く、急な支払いに対応するために利用することができます。このような少額融資は、総量規制内であれば問題なく融資を受けることができます。
3.4 他の融資先との契約内容を見直す
もし複数の街金や消費者金融から借り入れをしている場合、その契約内容を見直すことも有効です。
金利が高すぎる場合や、月々の返済額が多すぎる場合、借り換えを行うことで、新たに融資を受ける余地ができることもあります。
契約内容の見直しを行うことで、現在の借り入れ状況を整理し、総量規制を守りながら新たに融資を受けることが可能となります。
愛媛県(松山)の激甘審査の街金で即日融資を受けるには
愛媛県(松山)には、急にお金が必要になったときに頼りになる街金(消費者金融)が多数あります。
特に「激甘審査」として知られる街金は、比較的緩い審査基準を採用しており、融資を受けるハードルが低く、即日融資を受けられることが特徴です。この記事では、愛媛県(松山)の街金で即日融資を受けるための手順や注意点について、詳しく説明していきます。
1. 即日融資を受けるための基本条件
即日融資を受けるためには、事前に知っておくべき基本的な条件や準備がいくつかあります。
これらをしっかり理解しておくことで、スムーズに融資を受けることができます。
1.1 必要書類の準備
即日融資を申し込む際には、以下の書類を準備しておくと便利です。
- 本人確認書類:運転免許証や健康保険証など、顔写真付きの書類が望ましいです。顔写真がない場合は、住民票や公共料金の請求書を使用することもできます。
- 収入証明書:直近の給与明細書や源泉徴収票、確定申告書などが必要です。収入証明書がないと、審査が遅れることがあるので、事前に準備しておくことをおすすめします。
- 住居確認書類:公共料金の請求書や住民票など、住所を確認できる書類も求められる場合があります。
これらの書類をオンラインでアップロードできる場合もありますが、原本を店舗に持参する場合もあります。各街金の手続き方法に応じて準備を進めましょう。
1.2 オンライン申し込みの活用
最近では、街金のほとんどがオンラインでの申し込みを受け付けており、非常に便利です。
24時間、どこからでも申し込みができるため、急な借り入れが必要な場合にも非常に迅速に対応できます。
オンライン申し込みを利用することで、店舗に足を運ばなくても手続きが完了するため、時間を節約できます。
オンライン申し込みの流れは、公式サイトからフォームに必要事項を入力し、書類をアップロードするだけです。入力が完了すると、審査が始まり、審査結果が数分以内に届くこともあります。必要に応じて、審査結果に基づき追加情報を求められることもありますので、迅速に対応しましょう。
2. 街金での即日融資の審査基準
街金(消費者金融)の審査は、基本的に銀行や他の金融機関よりも柔軟です。
特に「激甘審査」をうたっている愛媛県(松山)の街金は、審査基準が緩いことで知られていますが、それでも一定の条件を満たす必要があります。
2.1 収入が安定していること
街金の審査では、借り手の収入が安定しているかどうかが重要なポイントです。
アルバイトやパートでも、一定の収入があれば融資を受けることが可能です。収入が不安定だと判断される場合は、融資が難しくなることもあります。
収入証明書が求められる場合が多いので、きちんとした証明書を提出することが大切です。
2.2 他社からの借入状況
現在、他の貸金業者から借入がある場合、それが審査に影響することがあります。
過去に多額の借入がある場合や、すでに多くの借入を抱えている場合は、審査が通らない可能性もあります。ただし、愛媛県(松山)の激甘審査の街金では、他社借入がある場合でも、柔軟に対応してくれることが多いため、過去に借り入れがあったとしても、収入証明書や返済能力を証明できれば、融資を受けられることもあります。
2.3 信用情報
街金は、信用情報をチェックして審査を行います。
過去に延滞や滞納があった場合、審査が難しくなることもあります。しかし、激甘審査を掲げる街金では、信用情報が多少悪くても、他の条件を満たしていれば融資が通ることもあるため、心配しすぎる必要はありません。
3. 即日融資を受けるための手順
即日融資を受けるための基本的な流れは次の通りです。
事前に流れを把握しておけば、迅速に手続きを進めることができます。
3.1 申し込み
まずは、街金に申し込む必要があります。オンラインでの申し込みの場合、公式サイトにアクセスして必要事項を入力し、必要書類をアップロードします。
店舗で申し込む場合は、窓口で手続きを行い、書類を提出します。申し込み後、街金が審査を開始します。
3.2 審査
審査は、通常数分から30分以内で結果が通知されます。
審査が通過した場合、契約内容や融資金額の確認が行われます。オンラインで申し込んだ場合、契約書類がデジタルで送付されることもあります。
3.3 契約と融資実行
契約手続きが完了した後、融資が実行されます。
多くの街金は、融資金額を口座に即時振込するため、急な支払いにも対応できる体制が整っています。振込が完了すれば、その日のうちに融資を受け取ることが可能です。
4. 即日融資を受けるためのポイント
即日融資を受けるためには、いくつかのコツがあります。
これらを押さえておくことで、よりスムーズに融資を受けることができます。
4.1 申し込み時間を早めに
即日融資を希望する場合は、できるだけ早い時間に申し込みをすることが大切です。
特に営業時間内に申し込むことで、審査が早く終わり、即日融資が受けられる可能性が高くなります。
4.2 必要書類を整える
書類に不備があると審査が遅れる可能性があります。
申し込み前に必要書類をしっかりと確認し、準備しておきましょう。
4.3 融資額を適切に設定
無理のない返済計画を立てるためには、必要最低限の融資額を選ぶことが重要です。
過剰な借入を申し込むと、返済負担が大きくなり、次回の融資が難しくなることがあります。
5. 即日融資後の注意点
融資を受けた後は、返済に関して慎重に行動しましょう。
返済期日を守ることは非常に重要で、遅延すると利息が増加したり、信用情報に影響を与えたりすることがあります。計画的に返済を進めることが、今後の融資利用をスムーズに進めるためのポイントです。
愛媛県(松山)の激甘審査を行っている街金で即日融資を受けるのは、急な支出に対応するための便利な方法です。自分の状況をしっかりと把握し、申し込みから返済までしっかりと計画を立てて利用しましょう。
愛媛県(松山)の激甘審査の街金と、闇金との違い
お金に困った時、すぐに借りられる場所を探す人は少なくありません。
特に愛媛県(松山)では「激甘審査」の言葉が目を引く街金(消費者金融)が多く存在し、即日融資を提供している業者もあります。しかし、こうした街金と一部で話題になる「闇金」には、実は大きな違いがあるのです。この記事では、その違いを丁寧に説明し、どちらを選ぶべきかについて考えてみましょう。
街金(消費者金融)とは
まず、街金(消費者金融)について理解することが大切です。
街金とは、金融庁などの行政機関に登録された、合法的な金融業者です。これらの業者は、法律を守りながら貸し付けを行い、借り手を保護する仕組みが整っています。愛媛県(松山)でも多くの消費者金融が営業しており、急な資金需要にも対応しています。
1.1 審査基準が柔軟
「激甘審査」と言われることのある街金では、一般的な銀行や大手消費者金融よりも審査基準が柔軟な場合があります。
しかし、それでも審査はしっかり行われます。例えば、安定した収入があれば、過去に金融事故を起こしていたとしても、一定の条件を満たせば融資を受けられる可能性があります。
ただし、審査が甘いとは言っても、必ずしも誰でも融資を受けられるわけではありません。あくまで返済能力が重視され、安定した収入や、過去の金融履歴が良好であることが求められます。また、融資額や金利については、法律で定められた上限を守る必要があり、過剰な金利が設定されることはありません。
1.2 契約と返済計画
街金では、契約書を交わし、明確な返済計画が立てられます。
契約内容は非常に詳細で、融資額や金利、返済スケジュールなどがすべて記載されており、利用者が不安になることはありません。万が一返済が困難になった場合にも、返済方法の変更など、サポートを受けることができます。
闇金とは?
一方で、闇金は違法に運営されている金融業者です。
これらの業者は、法的に認められていない方法で融資を行い、借り手を不当に搾取することが多いです。愛媛県(松山)にも闇金業者が存在しており、急な資金需要に迫られた人をターゲットにしていることがありますが、利用する際には非常に大きなリスクが伴います。
2.1 高金利と無責任な貸し付け
闇金の最大の特徴は、その金利が非常に高いことです。
合法的な金融業者では、金利は法律で上限が決まっていますが、闇金はその枠を超えて金利を設定することが可能です。年利100%を超えることも珍しくなく、これにより借りた金額はすぐに膨れ上がり、返済が非常に困難になります。
さらに、闇金では審査が行われない場合が多く、返済能力を無視して貸し付けられることもあります。このため、返済計画を立てることが難しく、気づけば借金が雪だるま式に増えていく危険性があります。
2.2 違法な取り立て方法
闇金の最も恐ろしい点は、その取り立て方法です。
合法的な金融業者は、返済が滞った場合でも法的手続きを踏んで取り立てを行いますが、闇金は違法な方法で借金を取り立てます。具体的には、脅迫や暴力的な手段を使ったり、借り手の家族や職場に迷惑をかけるような嫌がらせを行うことがあります。
これらの違法な取り立て方法は、借り手に対して精神的、物理的なプレッシャーを与え、最終的には法的な問題に発展することもあります。闇金に関わることは、命や生活に深刻な影響を及ぼす可能性があるため、絶対に避けるべきです。
街金と闇金の違いを比較
では、街金と闇金の違いを具体的に比較してみましょう。
以下の表に、それぞれの特徴をまとめました。
| 項目 | 街金(消費者金融) | 闇金 |
|---|---|---|
| 運営の合法性 | 正規に登録された合法的な業者 | 無登録の違法業者 |
| 金利 | 法定金利に基づく(15~20%程度) | 法外な金利(年利100%以上) |
| 審査 | 安定した収入や信用情報に基づく | 審査がない、または極めて緩い |
| 契約内容 | 明確な契約書と返済計画 | 契約内容が不明確、変更されることが多い |
| 取り立て方法 | 法的な手続きに基づく | 暴力的な取り立てや脅迫 |
| 利用者の保護 | 法的に守られ、返済方法の調整あり | 利用者は保護されない |
街金を利用する際の注意点
もし街金を利用する場合は、以下の点に注意することが重要です。
- 契約内容を確認する:契約書に記載された金利や返済方法をよく確認しましょう。不明な点があれば、事前に問い合わせて解決することが大切です。
- 返済能力を慎重に評価する:無理のない借り入れを心がけ、返済計画を立てることが重要です。返済が難しいと感じた場合には、早めに業者に相談しましょう。
- 不審な業者に注意:もしも「街金」と称している業者が不審な場合、十分に注意が必要です。合法的な業者かどうかを確認するために、金融庁のサイトや登録業者リストを確認しましょう。
愛媛県(松山)の激甘審査の街金で審査落ち・・お金を借りれないときは
愛媛県(松山)の街金(消費者金融)は、多くの借り手にとって「激甘審査」を提供する金融機関として知られています。
審査が緩いと評判ですが、それでも必ずしも誰もが審査を通過できるわけではありません。もし、街金でお金を借りられない場合、どうすればよいのでしょうか?審査落ちの理由を理解し、その後の対応方法を知っておくことが重要です。
1. 街金の審査が通らなかった理由とは?
街金(消費者金融)は、他の金融機関と比べて審査が比較的緩いとされていますが、それでも審査を通過できない場合もあります。
まずは、審査に落ちる原因を知ることが大切です。
1.1 信用情報に問題がある
街金は、申込者の信用情報を元に審査を行います。
過去に延滞や滞納があった場合、その情報が信用情報機関に記録されています。この記録があると、いくら審査が甘いとされる街金でも、通過が難しくなることがあります。
1.2 他社借り入れが多い
すでに他社から多くのお金を借りている場合、街金はその返済能力に疑問を持つ可能性があります。
借り入れが多いと、返済能力に問題があると判断されるため、審査に落ちてしまうことがあります。
1.3 収入の安定性に疑問がある
収入が不安定な場合や、過去に仕事を転職している場合など、収入の安定性が見込めないと審査に通りにくくなります。
街金は、返済能力を確認するために収入の安定性を重要視しています。
1.4 必要書類に不備があった
審査には、本人確認書類や収入証明書などの提出が求められます。
これらの書類が不備だったり、提出期限を守らなかったりした場合、審査に通過できないことがあります。書類の不備をなくすことが、スムーズな審査のためには大切です。
2. 審査に落ちた場合の対処法
審査に落ちた場合でも、冷静に対応することが重要です。
ここでは、審査に落ちた場合に試すべき方法をいくつか紹介します。
2.1 信用情報の確認と改善
もし審査に落ちた原因が信用情報にあると感じた場合、まずは自分の信用情報を確認することが重要です。
信用情報は、全国の信用情報機関を通じて確認できます。万が一、誤った情報が記載されていた場合は、その訂正を依頼することが可能です。また、信用情報に傷がついている場合、傷が消えるまで時間がかかることを理解しておくことが大切です。
2.2 収入源を安定させる
収入が不安定な場合は、安定した収入源を確保することが重要です。
アルバイトや契約社員などの不安定な仕事から、正社員としての仕事に転職することを検討してみましょう。また、フリーランスの方などは、安定した収入を得るための努力をすることが、審査通過の近道となります。
2.3 借り入れ状況を見直す
他社から多くのお金を借りている場合は、その状況を見直しましょう。
借り入れの一本化を検討したり、借金を減らしたりすることが、審査に通りやすくするために有効です。借り換えを利用することで、月々の返済額を減らし、より安定した返済が可能になります。
2.4 必要書類を確認し、再提出
審査に落ちた理由が書類不備である場合は、必要書類を再度確認し、しっかりと準備しましょう。
収入証明書や本人確認書類など、必要な書類が不足していないかを再度チェックします。また、書類の提出期限を守ることも重要です。
3. 審査に落ちた場合の代替手段
もし街金(消費者金融)で審査に落ちた場合でも、他の方法でお金を借りることはできます。
いくつかの代替手段をご紹介します。
3.1 銀行のカードローンを検討する
街金で審査に落ちた場合、銀行のカードローンを利用する方法もあります。
銀行のカードローンは金利が低く、審査も比較的厳しいですが、審査基準が異なるため、通過する可能性もあります。申込み時には収入証明書を提出する必要がある場合があるため、準備をしておきましょう。
3.2 質屋を利用する
質屋では、物品を担保にお金を借りることができます。
金や時計、ブランド品など、価値のある物を担保にすることで、信用情報に問題がなくてもお金を借りることが可能です。返済ができなければ物品を取り戻せなくなるリスクはありますが、返済計画をしっかり立てて借りることができます。
3.3 親や友人から借りる
最もリスクが少ない方法は、親や友人からお金を借りることです。
もしお金を借りる必要があるなら、信頼できる人に相談してみましょう。お金の貸し借りは慎重に行うべきですので、返済計画をしっかりと伝え、約束を守ることが大切です。
3.4 クレジットカードのキャッシングを利用する
クレジットカードにはキャッシング機能がついている場合があり、急にお金が必要なときに手軽に借りることができます。
クレジットカードのキャッシングは、街金よりも金利が高いため、利用する際は早期に返済することを心掛けましょう。
4. 審査に通るための心構え
審査に通るためには、まず自分の状況をしっかりと把握することが大切です。
無理にお金を借りようとすることは、返済が困難になる原因となります。借りる金額や返済計画をよく考え、自分にとって無理のない借入を心掛けましょう。また、借りたお金は計画的に返済することが、最も重要なポイントです。